Download and Installation
Download and install the appropriate version of the client from the homepage‘s download link, then launch it. Currently Sing-Box does not provide Windows, Linux GUI client, so we recommend GUI for SingBox, here is the GUI for SingBox user guide.
Adding a Subscription
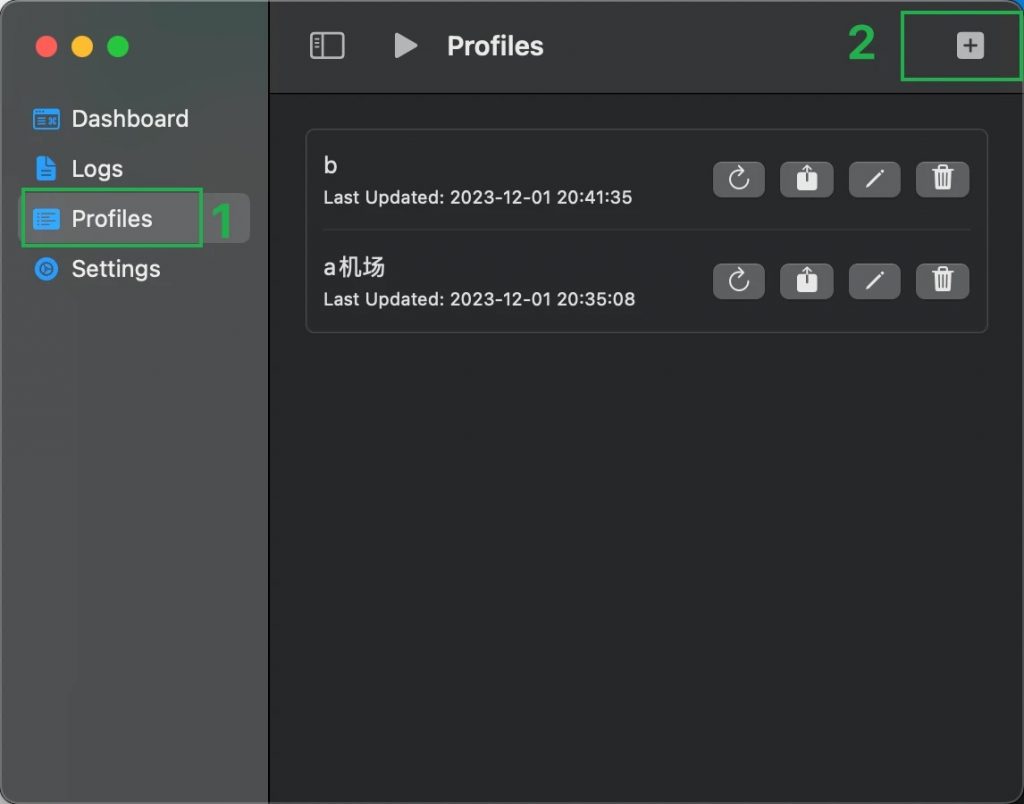
Go to ‘Profiles’ in the left-hand menu, then click the ‘Add’ button in the top right corner.
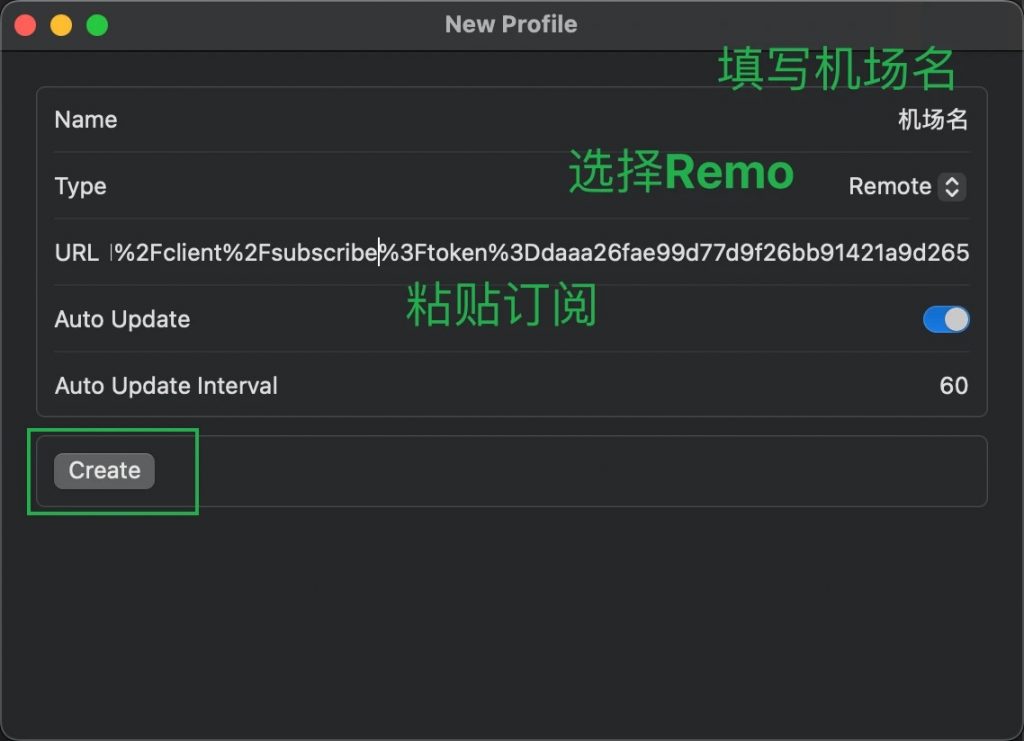
Enter the subscription name, select ‘remote’ for type, input the subscription link, and then click ‘create’.
Using the Proxy
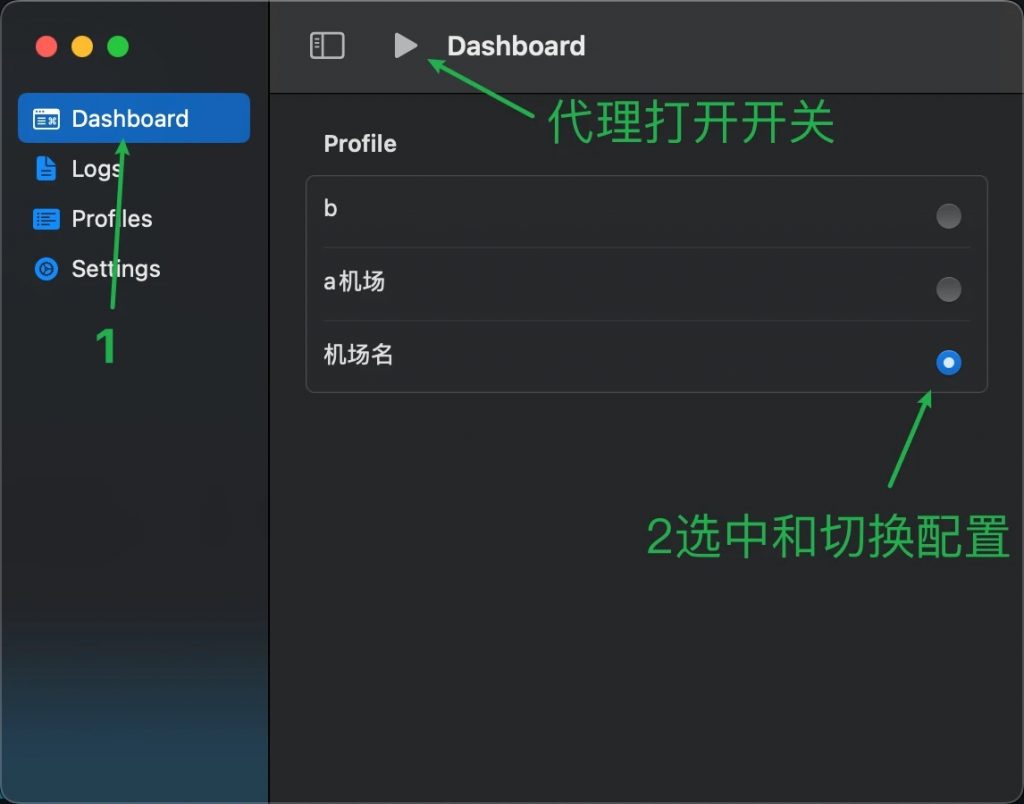
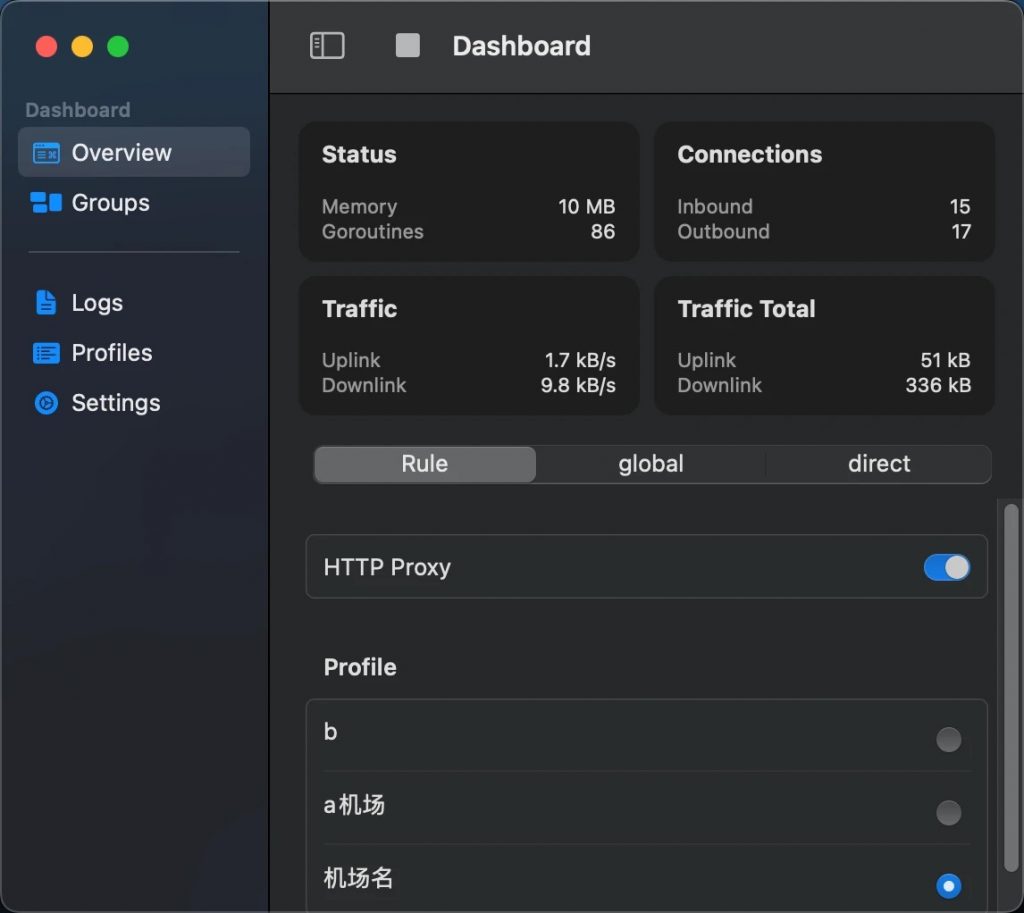
Click on ‘Dashboard’ in the left-hand menu, then select the subscription you just added from the right-hand list, and click the ‘Start’ button at the top to enable it.
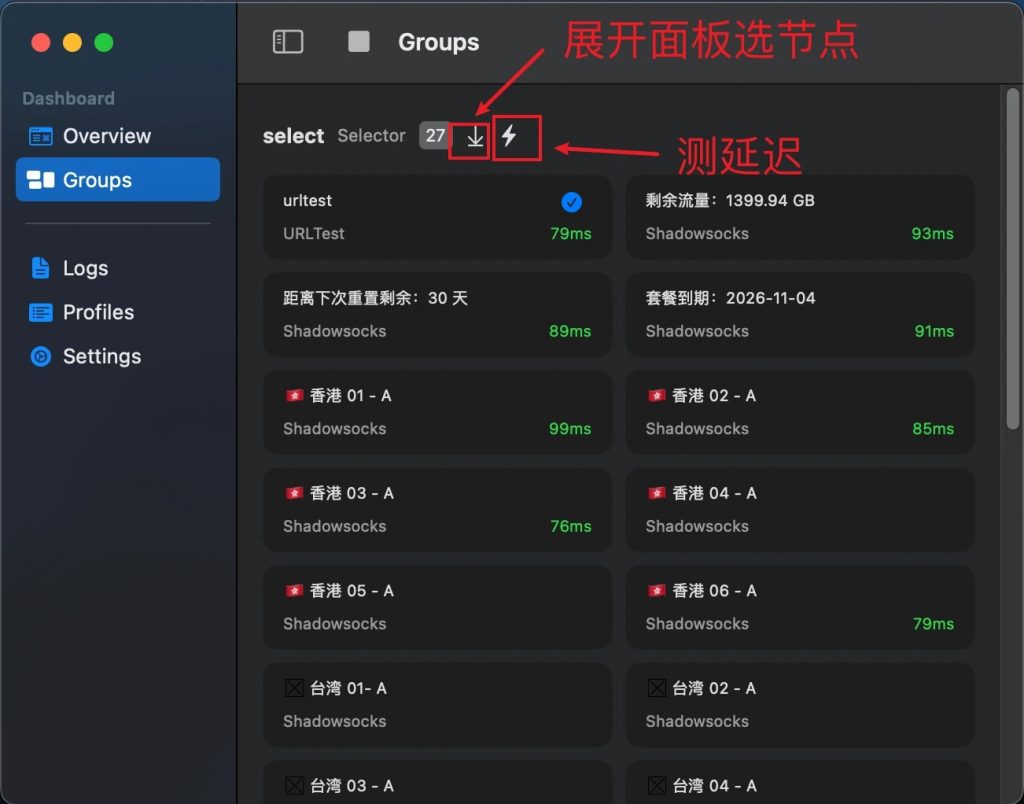
Once activated, a ‘Groups’ menu will appear on the left.
Click on ‘Groups’, and a list of available proxies will appear on the right. You can click the lightning icon to conduct a speed test, then choose the appropriate service to start using.